JustGardenCentres.com
![]()
It will sound obvious but I'll write it anyway! To grow basil plants from cuttings you need a donor plant and there won't be many options when you should ideally be taking cuttings unless you have a basil plant of your own growing on a windowsill.
Your only realistic option is to buy a live basil plant from a supermarket and take cuttings from that. As far as I am aware, the only variety which is sold by supermarkets is the variety "Genovese", commonly known as sweet basil. Be aware of this fact if you ever consider some of the more esoteric varieties of basil.
Genovese is a relatively problem free variety of basil and it tastes more of basil compared to other varieties.
Basil originated in tropical regions of India and Southeast Asia and there's a clue in that as to what conditions basil prefers throughout its life, from seed germination to harvesting. It likes warm conditions! It also does not do well in windy conditions.
To grow basil from cuttings, a temperature range of 70°F / 21°C to 80°F / 27°C is ideal. For this reason it's only really practical to take basil cuttings indoors. A heated greenhouse might be OK but it will be very expensive to heat it to that temperature in spring.
With the above in mind, our recommended timings for growing basil from cuttings are:
Take basil cuttings in the third week of April in average UK areas.
Plant cuttings in pots in the first week of May in average UK areas.
Harden off basil starting in the first week of June in average UK areas.
Move basil to final full sun position in the second week of June in average UK areas.
Begin to harvest basil in the first week of July in average UK areas.
When a basil cutting is taken, the end of the stem where the cut is made will quickly form a callous which can easily stop the stem from absorbing water and cause the cutting to fail.
It's key to success to know exactly how you are going to take the cutting before you actually take the cutting and have the few items you need already prepared. If you do that, you can take the cutting and get the stem into water with minimum of delay. Minutes really do count in order to prevent the stem forming a callous.
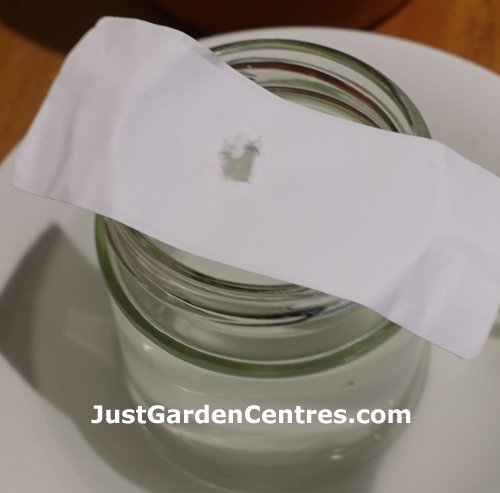
You need a very sharp, small knife (to make a clean cut), a small container (at least 15cm / 6in high) for each cutting you intend to to take and some paper to place over the top of the pots.
Place the paper loosely over each pot and pierce a hole in the paper large enough to fit a basil stem. It should look something like the picture below.
![]()
Basil cutting support
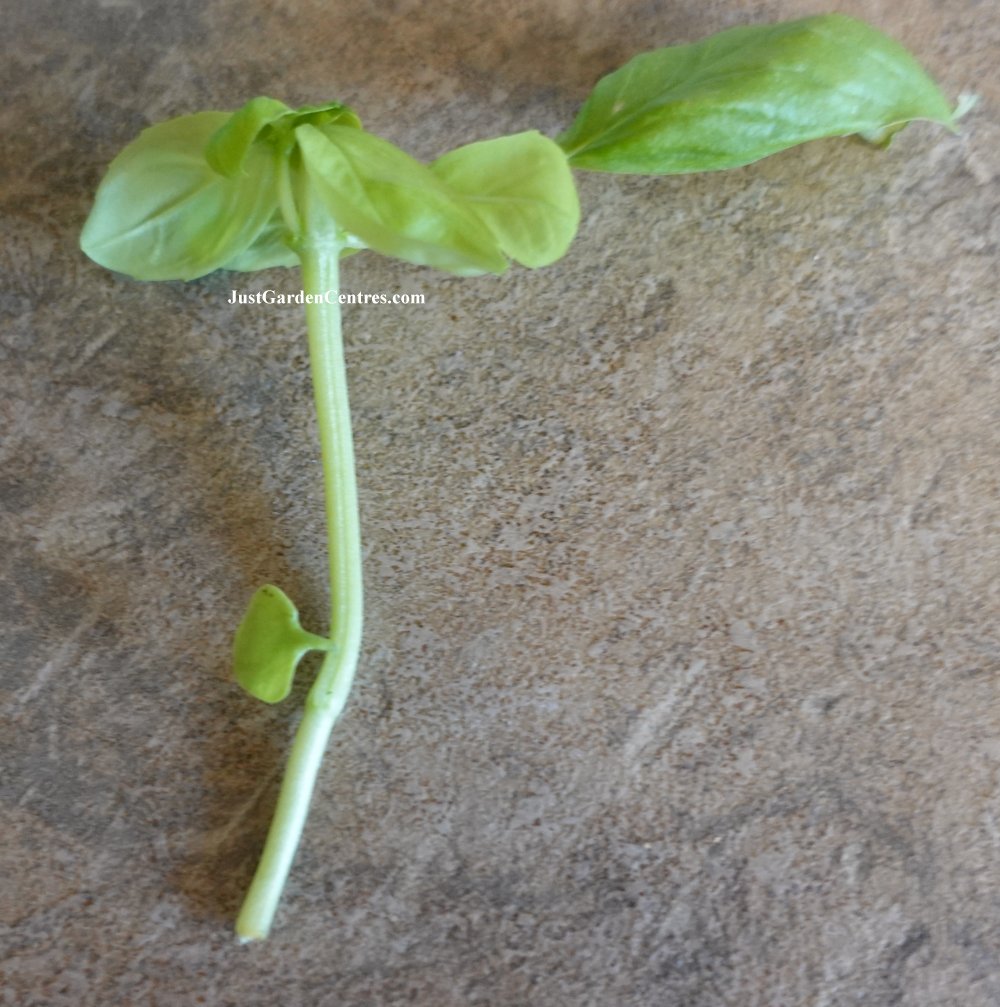
Next, take a good look at your donor plant and identify two or three stems which have four of five healthy leaves at the top of the stem with a set of leaves below that.
![]()
Basil leaf stem and leaf node
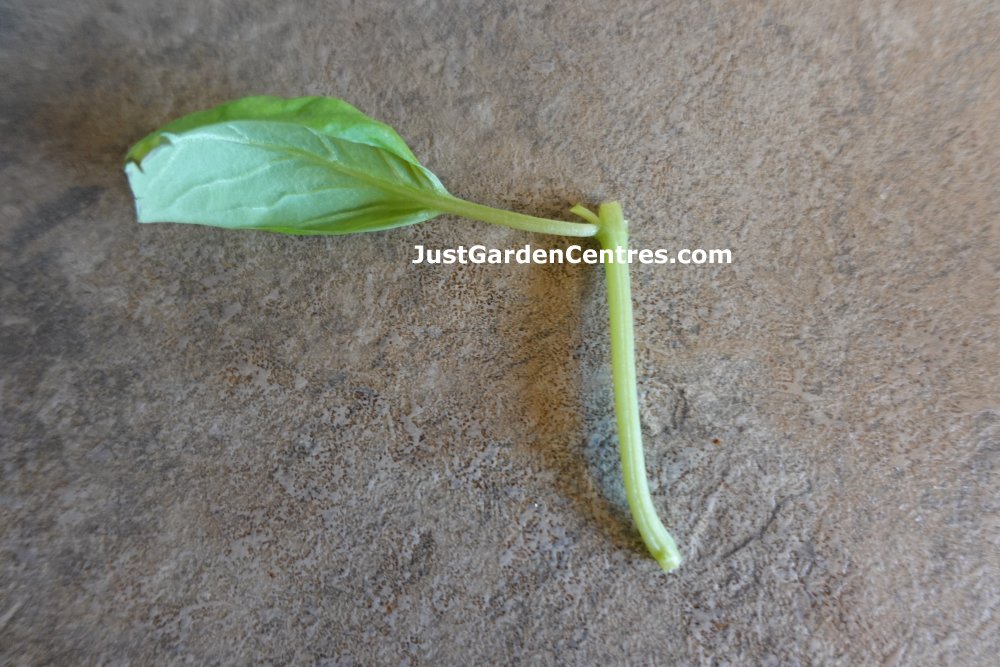
Cut the stem just below the set of lower leaves (at a leaf node) and carefully pull off the lower leaves. Next trim off most of the top leaves leaving just one or two. Your cutting will look something like the picture below.
![]()
Trimmed basil cutting
The cutting is now ready to place the stem through the hole in the paper on the container(s). Do this so that the stem is fully immersed in the water below.
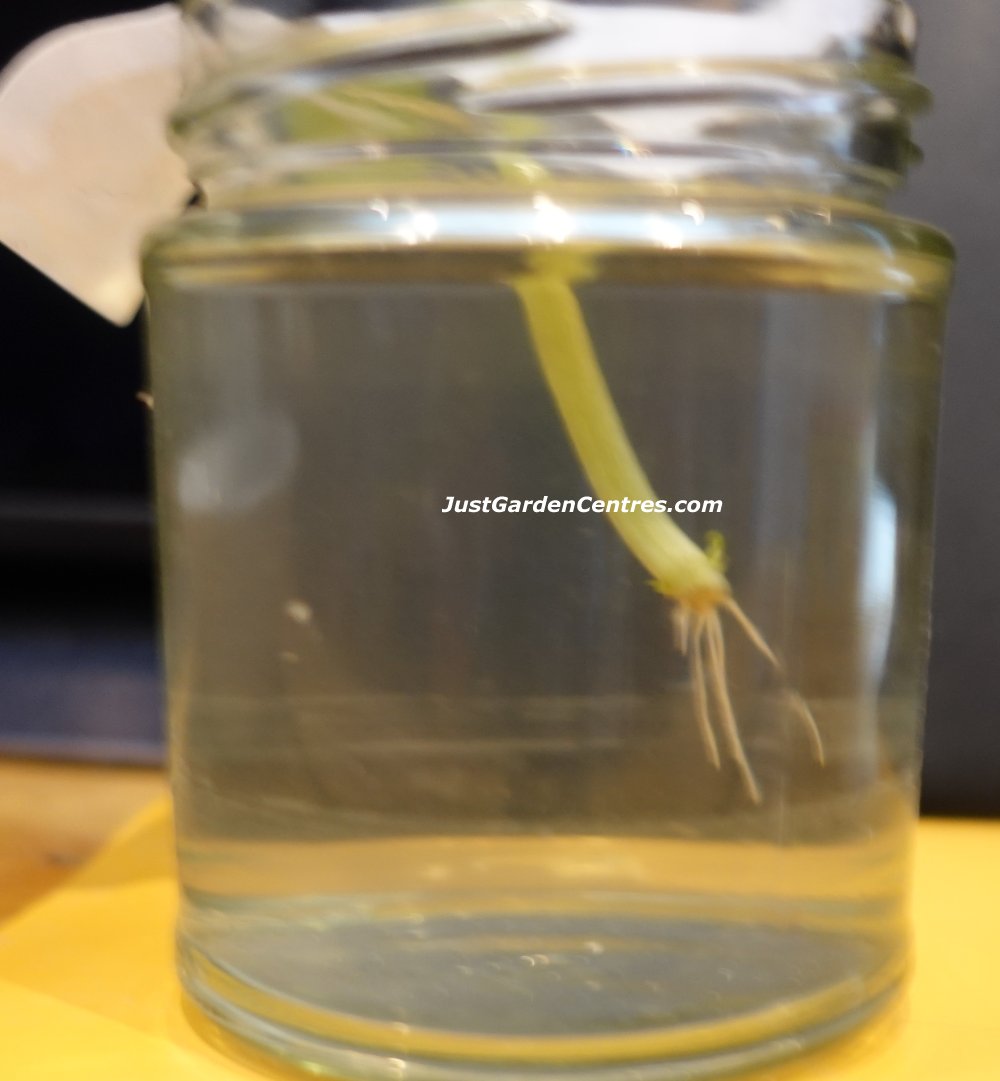
The basil cutting will take about ten days for roots to start to form, these will be clearly visible through the container glass. While the roots are forming refresh the water in the jar with lukewarm water every three days. This will prevent algae from forming in the water.
![]()
Basil Cutting Sprouting Roots
When the roots of the cutting reach 2cm / 1in long it's time to transfer it from the water in the container to a 8cm / 3in pot full of peat free multipurpose compost.
Don't let the roots grow longer than 2cm / 1in in the container full of water - if you do the roots are likely to break off when you transfer the plant to the pot of multipurpose compost.
Fill the pot with peat free multipurpose compost and let it stand for 30 minutes or so in a container of lukewarm water, the water should be 5cm / 2in deep. Now make a hole in the damp compost just slightly wider than the roots. The hole should be approximately 7cm / 3in deep.
Place the cutting into the hole and gently firm the compost around the roots. Don't apply much pressure (too much pressure will damage the roots) but ensure that the compost is in close contact with the roots and stem.
Place the pot in a light (but not direct sunlight) and draught free position, trying to maintain a temperature of around 70°F / 21°C to 80°F / 27°C. At this point the plant is still very tender so don't place it outside your house.
After two weeks the basil plant will be more established and less tender.
Up until the point when you begin to harden off the basil plants outside (see below), the basil plants should be watered sparingly and preferably by placing each pot in a tray of water for 15 minutes or so to allow it to absorb the water from the base of the pot.
See below a picture of the cutting we took, five weeks later. The cutting has clearly rooted and is now producing lots of new leaves.
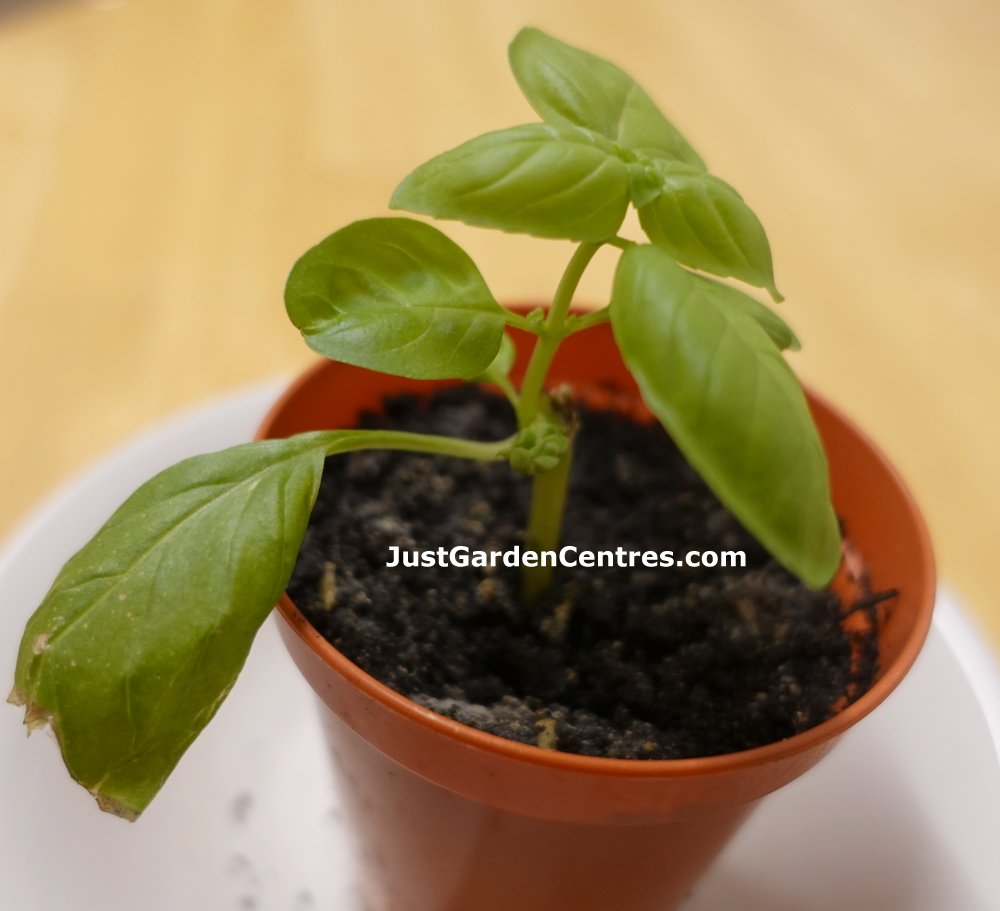
![]()
Basil cutting rooted in compost
The compost in the pot will contain all the nutrients the growing basil plants need over the next eight weeks so don't add any liquid feed until the plants are growing outside.
Basil is unusually temperature sensitive and they also dislike windy conditions. For this reason they need to go through a hardening-off process for a week or two after they are first placed outside.
When you first start to harden-off a basil plant, do not expose it to prolonged full sun at first, do this gradually.
Start to harden off basil seven to eight weeks after the time we recommend sowing the seed - see the calendar at the beginning of this page. On this basis, start hardening-off the basil plant in the first week of June in average UK areas.
Start thinking about planting out your basil plant around the second week of June in average UK areas. Always err on the side of planting out a week or two later if you have any doubts about the strength of the plant or the weather conditions.
The two options you have for planting out basil plants are to either plant it into a larger pot with the idea of growing it in pots for its life or to plant it into a prepared bed in open ground.
The option I choose each time is to grow basil outside in pots / containers. I aim for an eventual pot size of around 25cm / 10in. This will require potting up the plants in two or three stages. Place the pots in a full sun position protected from strong winds.
Planting basil out in open ground seems pointless to me. Three plants will supply all your needs for fresh leaves with plenty left over for drying to last over winter and spring.
Watering basil plants in containers growing outside involves keeping the compost moist but not waterlogged. How often this is required will depend on weather conditions.
As far as feeding basil is concerned, basil requires minimal feeding. Once a month when you water basil add a small amount of general purpose liquid fertiliser. Do not use tomato feed, this will only encourage flowers which in turn will reduce leaf production.
Pruning basil plants improves their health considerably and should be done regularly whether you need the leaves or not. Harvesting basil is achieved in the same manner but you will only do this when you need some leaves.
Every week or so examine your plants to identify any stems which have four or more leaf nodes on a stem. A leaf node is the point at which a pair (although sometimes only one) of leaves are attached to a stem. See the picture below where we have cut part of a stem to identify what a leaf node looks like.
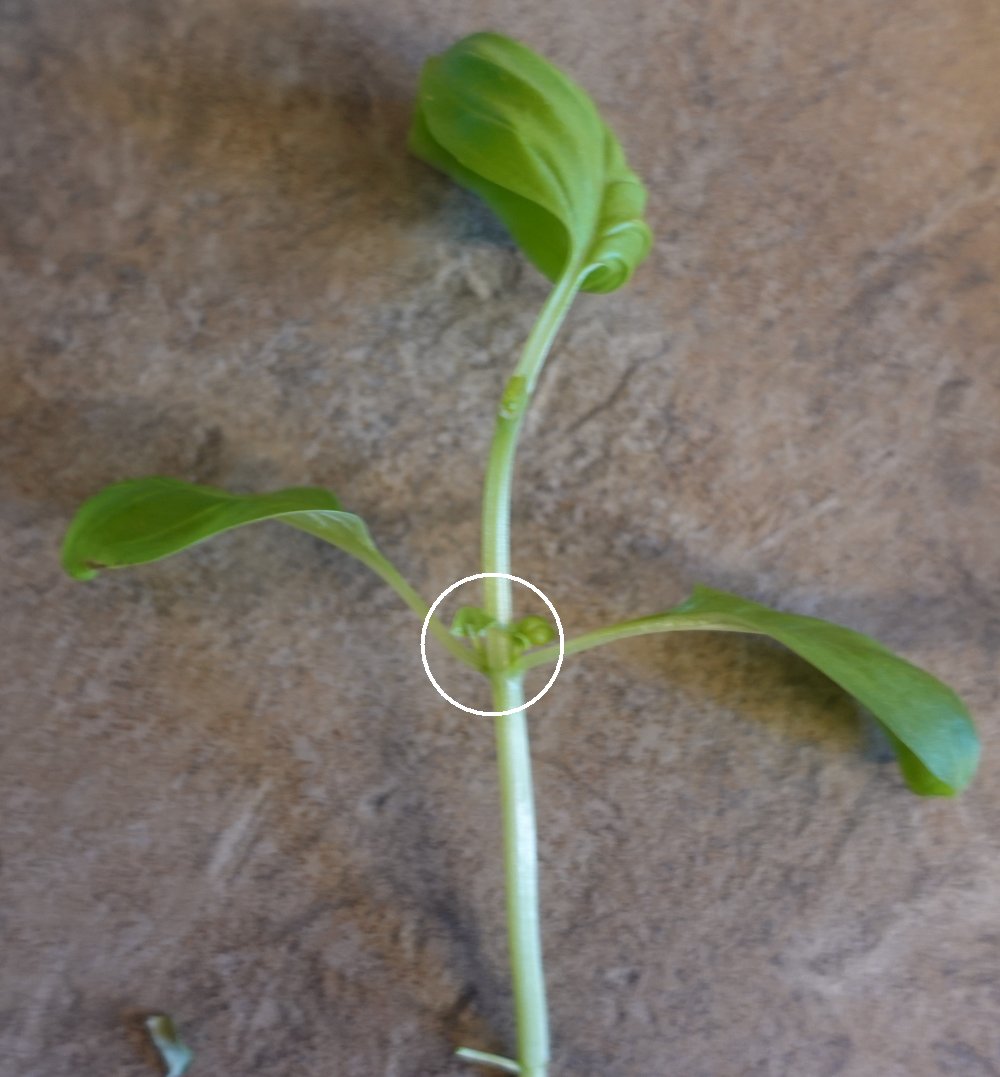
![]()
Basil Plant Leaf Node
The area in the white circle, where two leaves join the stem, is the leaf node. If you look carefully at the circled area (click the picture to enlarge it) you will also see that two very small shoots have sprouted between each of the leaves and the stem. These will grow into new stems.
Prune each stem just above a leaf node leaving just two leaf nodes. This will encourage the plant to produce more stems and at the same time, stop the plant growing weak and leggy stems.
Note that when your basil plant is young it will have just one stem. As soon as that stem reaches four or more leaf nodes it's time to prune it.
It may sound harsh but by pruning that stem the plant will grow two stems from each of the remaining leaf nodes. And that's the way to grow a healthy and bushy basil plant - each time you prune it you will be rewarded with two stems instead of one.
To harvest basil leaves don't simply pull off the leaves. Instead, prune as many stems as you require using the pruning technique described above. The pruned stems / leaves can be put into a bowl of water for an hour or so until they are required, at which point the leaves can be pulled of the stems for use.
To store basil leaves they can either be dried or frozen in water. Click here for some ideas on how to preserve basil leaves for many months.
IF YOU HAVE ANY QUESTIONS OR COMMENTS
CONCERNING THIS PAGE, ENTER THEM BELOW.
WE WILL ANSWER ON
THIS PAGE AS SOON AS POSSIBLE
Copyright 2025 - 2026 JustGardenCentres.com. All rights reserved